In our last post, we talked about how to get started planning a menu for a backpacking trip: how much food to bring, what kinds of fresh food lasts, spices, and packing. The second part of this post delves a little deeper into some of the finer points on how to craft great meals with the most minimal kitchen you could possibly imagine. We’ll talk tools and utensils, stoves, fuel, and don’t forget about that birthday cake we mentioned…
Hot, Hot, Hot…
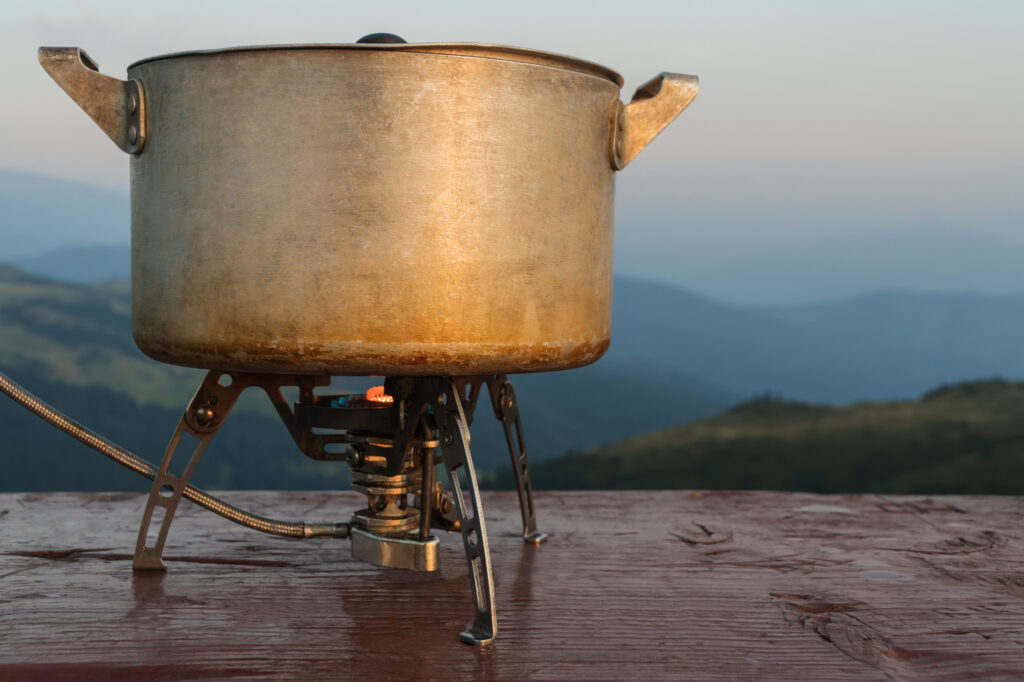
The type of stove and fuel, as well as the specific model, that you choose for your trip often depends more on the weather you’ll be expecting and how many group members you will have. The actual dishes you’ll be preparing have little to do with your selection. All of the backpacking stoves I would recommend are single-burner, which come to think of it, I’m not sure there’s such a thing as a multi-burner backpacking stove; but, perhaps to state the painfully obvious, let’s just make sure we’re not talking about packing in one of these hefty bad boys.
There are different options for fuel and corresponding stove type, and three that are most common: white gas, isobutane, or denatured alcohol. Each has their specific advantages. I like to use white gas, used in stoves like an MSR Whisperlite, for colder weather trips. This fuel burns pretty hot so it’s fairly efficient, but really only has two speeds: off or full-blast. That makes it difficult to simmer or saute without burning, but if you’re mostly boiling water for soup and hot drinks, it’s just fine. These set-ups have a pump to re-pressurize the fuel canisters which is ideal for cold-weather camping since other types often lose pressure resulting in a weak flame during use.
Isobutane stoves are work horses and are probably the most universally awesome choice for most trips. The fuel is super-efficient so you don’t need to carry a ton of it, and they get better control for simmering than the white gas. On our last Grand Canyon trip we used about 40 ounces of fuel for 7 people over 4 days: two hot meals a day and hot drinks for all day and night. These stoves are also really durable compared to the liquid fuel types–they rarely break down or need servicing in the field. If I had a larger group I’d bring one (or two) of these for sure. The only real draw back is that in cold weather the canisters can lose pressure resulting in weak flame, they’re not refillable, and can be difficult to find if travelling remotely.
Alcohol stoves are probably the most bombproof simple design–you just pour a small amount of fuel into the cylinder and light it on fire–that’s it. There’s no pressurized canisters or pumps to fail, or valves to clog. These are super popular among ultra-lighters for good reason. Since the fuel isn’t under pressure, it doesn’t burn as hot so boiling lots of water or cooking large meals for a big group can be cumbersome with this type. They’re also not as good in cold weather for the same reason. However, the heat is lovely for simmering and sauteing compared to other stoves.
Cozy Up to Your Dinner
One of the trickiest parts about cooking on a small camp stove, especially for a larger group is not burning the bacon, so to speak. We’ve all been there: your one-pot masterpiece is in the final stages simmering over your Windpro, you get wrapped up in some conversation about that waterfall you crossed on the trail earlier that day and then–what’s that burning? The bottom of your pasta is smoking and infusing the rest of the dish with that unmistakable blackened flavor. Camp stoves run pretty hot to boil water quickly, but generally don’t simmer all that well.
One of the best ways you can avoid this scenario is by insulating your almost-finished dinner in a pot cozy like this. Or, you can simply bring a half-sized insulite pad and wrap your hot cookware in that. Cook your dish part way, then when you’d normally simmer to finish, take it off the stove and wrap the pot up and let it sit in it’s own heat for a while till it’s done. Let’s say you’re cooking a rice-based stir fry for example: Add your rice and water and bring to a boil. Add your veggies or whatever extras you’ve got, give it a couple minutes on the stove, then take it off. Wrap the whole thing up and let it sit for about a half hour or so. The rice will continue to cook and soak up water, and stay hot till you’re ready to eat. And, you’re free to go about other tasks in camp or just hang out and watch the sunset. It’s impossible to burn and really difficult to overcook at all really.
Tools of the Trade
Like any good craftsman would tell you, there are certain tools for every trade that are must haves and cooking in the backcountry is no different. There are a few simple things I keep in my pack on every trip that make a big difference. One is a good knife. Now, I don’t necessarily mean I’m carrying a big 10″ chef’s knife around, but I do prefer to have a decent fixed blade instead of a small folding knife. This sharp little number is light and compact at 6.5″ and in my opinion is worth the weight. Another item I always carry to pair with a good knife is an ultralight cutting board like this one. It slides right into the back of most any sized pack and doubles as a serving tray or plate–very versatile and handy. The third is a what GSI Outdoors calls a “compact scraper”. This might seem a little frivolous but hear me out; it’s part scraper, part spatula, part emergency eating utensil, and fits inside a nalgene bowl, and it makes cleaning to LNT standards WAY easy.
Have Your Cake and Eat it Too
So, baking in the camp kitchen isn’t as complicated or daunting as it may sound; and it can add a touch of flair to your trip especially if you’ve got an upcoming backcountry birthday. There are a few different ways to do it, but my favorite is definitely the steam-baking method. Essentially, all you need is a double nesting pot set to create a double-boiler, one inside the other. Fill the larger pot with a little water, and a couple stones to elevate the smaller pot off the bottom. Cover with just the lid for the larger of the two. Grease the small pot with a little butter or oil and fill with your cake ingredients and put the whole thing on the stove. Here’s a pretty good post that illustrates the whole method using a Trangia alchohol stove (which I also like quite a lot!). This method is quite fuel intensive so make sure you bring extra. Or use it on the last night before you hike out to bake a celebratory dessert (and use up your extra fuel and ditch some weight)!